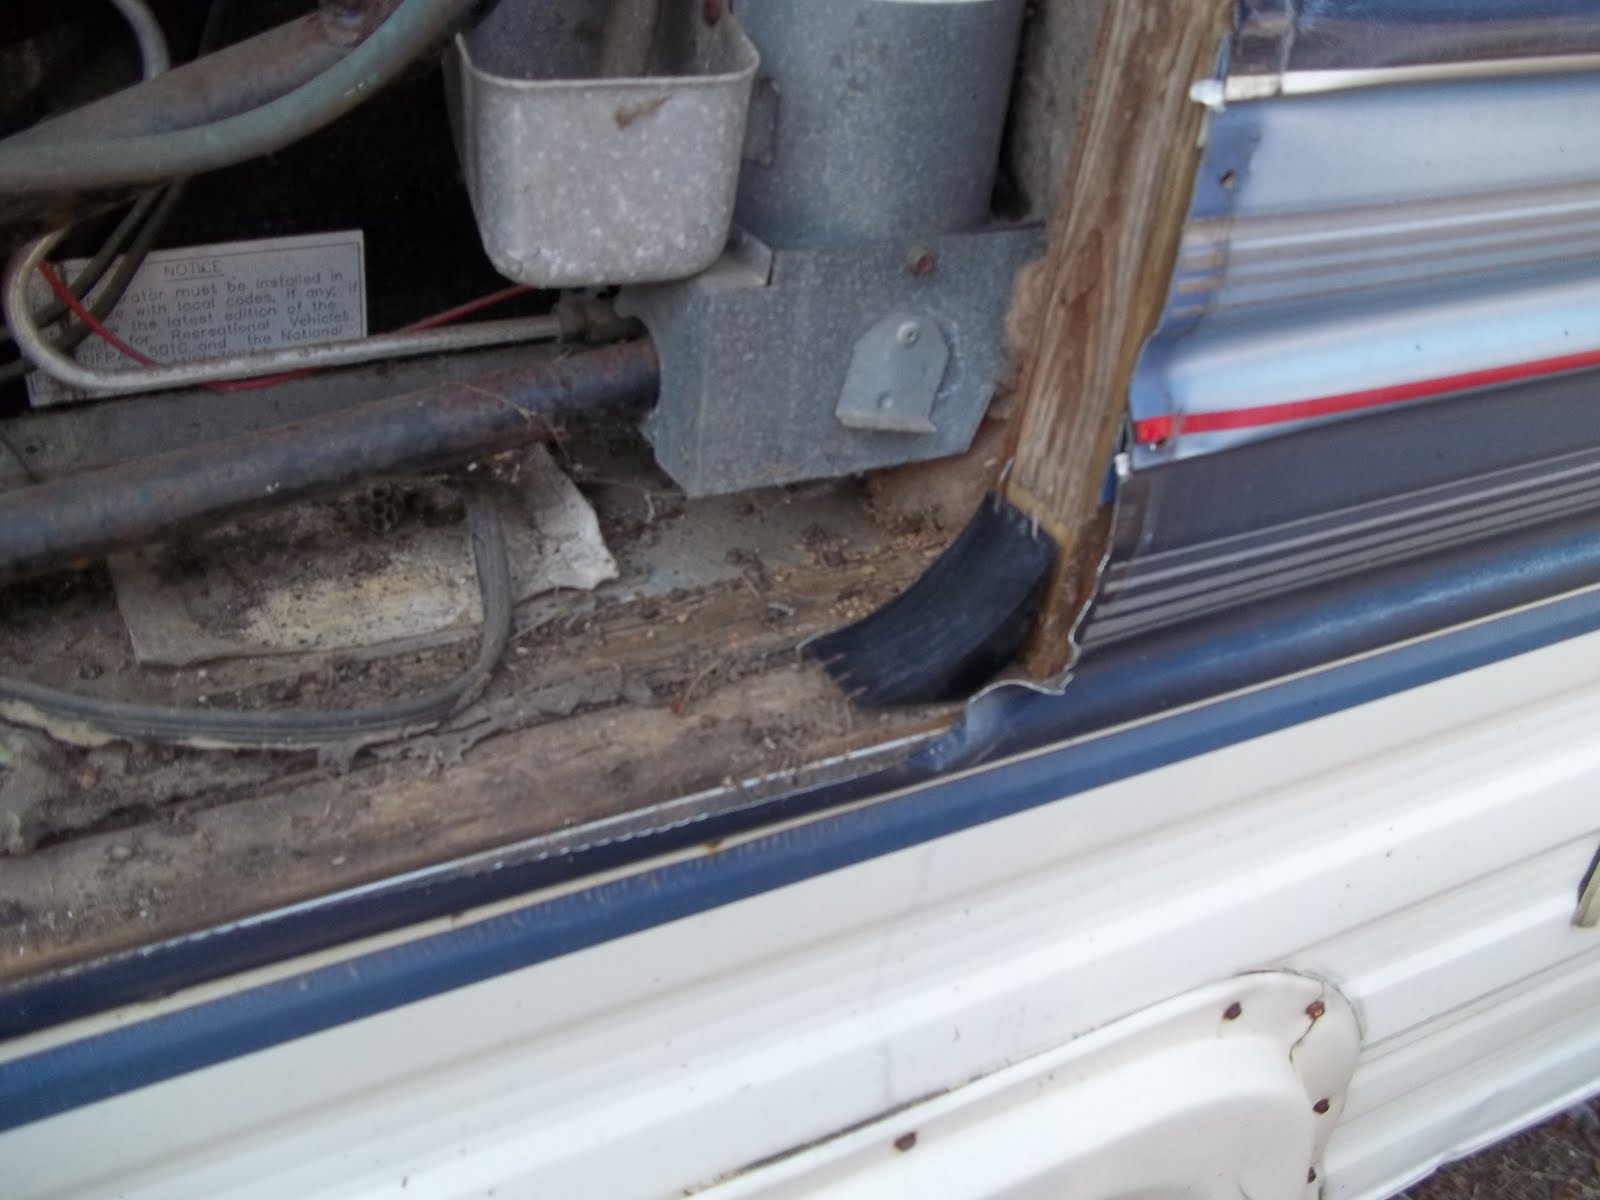
Well this week we made some real progress, but we did have to call in the pros. We had a specialist come in to service the AC and Fridge. Even though I hate to admit it, I am not a refridgeration expert, so we called in RBI Mobile RV repair. Roger is a very knowledgeable person, and the rates are well worth the cost. This is one piece of advice I can give. Even when working on a budget, like we are, it is better to pay someone who can fix it right the first time. Than to spend hours and still possibly have to pay for repairs. Roger got the AC working and checked the fridge, as well as provided wonderful information. Just be sure to check some references for the person you are going to have work on your RV. The good news is that all the major appliances work, we now have good AC, fridge gets cold, and the water heater heats the water. We did have to replace the heating element in the water heater. I want get into the details because this is a very simple fix, turn off power, remove two wires on the heating element, unscrew the element, and replace in the same order. Remembering to fill the water heater and check for leaks before turning on the power. We also finished all the minor issues. Keep checking because next week I will have an interesting project.
The best news is that we are on schedule to move July 23, 2011. Coming up I will be showing you how to repair damage to the corners, replace the brakes, and replacing an awning.
Have fun and Happy RVing.
Wednesday, June 22, 2011
Sunday, June 19, 2011
Sorry for not updating last week
I just wanted to say I am sorry for not updating this blog last week. We really didn't do to much. A local RV dealer was having a going out of bussiness sale, everything was at cost, so we went ahead and finished getting everything we needed to finish. I will be working on it again this week and hope to have more good information. The date is set for us to move into our rig on July 23, 2011. So hopefully the technical stuff will be finished then, except for the occasional repair. The good news is that hopefully most of the blogs will be about our adventures. Again sorry about the delay.
Have fun and Happy RVing.
Have fun and Happy RVing.
Wednesday, June 8, 2011
Replacing an access door
We also had to replace the access door to the refrigerator. First remove the old door by removing all the screws holding it on and pull it off.

Then measure the opening between the framing both height and width. You will have to buy the replacement door to fit this opening. Because of the age of our camper we could not find an exact replacement, so we found one that fit the height and width of the opening, but the corners were not as rounded as the original.

In order to make the replacement door work we had to first remove the corner radius blocks that were put in for the old door.
Then we used the new door to mark the siding so we could trim it off. Using sheet metal shears to cut the corners along the marks.


Next put the access door frame into the opening and secure with screws through the mounting holes.


Finally put the door into the frame, most new doors simply snap into place. And the job is done.

It took about half and hour to replace this door. The new door cost 40 dollars, so it isn't cheap, but most mobile technicians around here charge 85 dollars and hour and up plus parts. Along with a service call charge of 50 dollars and up just for coming out. So I saved at least 90 dollars by not having to pay the service call or labor bill. Not bad for a half hour of my time.
Have fun and Happy Rving.
Moving ahead
Today was a good day we made some good progress on the camper. And have managed to come out under budget so far. Today we replaced the propane regulator, replaced the access door on the refrigerator, checked the water lines for leaks, checked the stove for proper operation, put up new blinds, and rehung the valances over the windows.


I will start with replacing the propane regulator. Most places recommend you replace them every 10 years and since they are not expensive, ours was only 40 dollars. Most RV suppliers or dealers will have them in stock.

This was our old regulator, the hoses going to the tanks had to be replaced because they did not have the right fittings for the new OPD valves being used on tanks.

Our new regulator and connection hoses. Start by removing the old regulator assembly from the camper. This is really simple, there will be only one hose from the regulator to a connection on the campers frame. Your will have to unscrew this hose, most will use a 7/8 inch wrench. Then remove the wing nut on top and pull the assembly off. Next there will be a couple of screws that hold the regulator onto the mounting bracket. Mine had 2 but some have 4. You may have to drill a new hole in the mounting bracket to match the mounting hole in your regulator. Then connect the tow hoses that go to the propane tanks, the proper ports in the new regulator will be marked with arrows and inlet side. Then you replace the hose in the bottom of the regulator that connects to the camper, this will also be marked with an arrow and outlet.
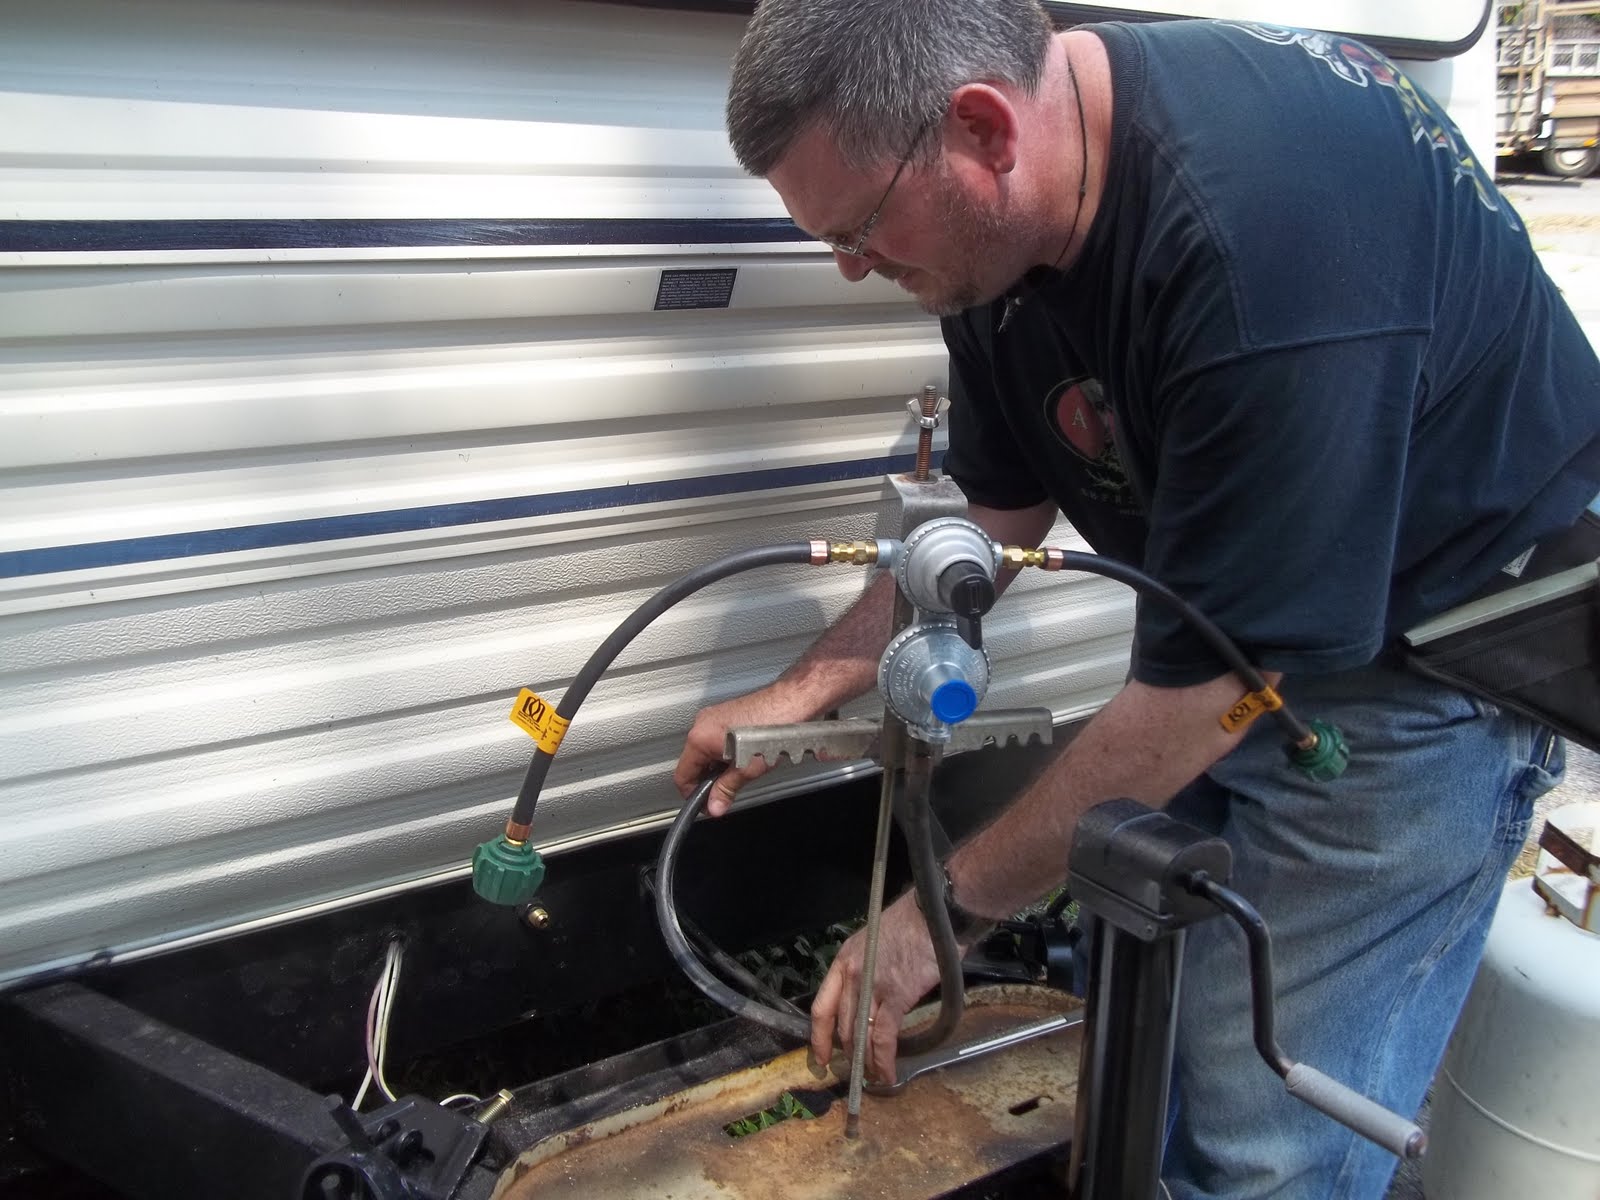

Next put the completed assembly back on the camper and reconnect the hose to the fitting on the frame. Finally use a spray bottle with some mild soap and water to wet all the connections and look for bubbles forming. If your see bubbles tighten the connections. When no bubbles form the installation is complete.
Tuesday, June 7, 2011
Getting ready for this weeks progress
We went shopping today for some more supplies, in order to be ready for work tomorrow. We picked up blinds for the windows, a register vent to finish relocating the vent I moved building the bed frame, we also bought a new propane regulator, and a service access door for our Norcold fridge. We had to replace the pigtails on our regulator because of the new OPD valves used on propane bottles, since we where replacing the pigtails anyway we decided to replace the entire regulator since it is recommended you replace them every 10 years. It is a 40 dollar part and not hard to put on, I will be posting the picks tomorrow, along with the instructions. Well that's all for today, lots to come tomorrow.
Have fun and Happy Rving,
Have fun and Happy Rving,
Wednesday, June 1, 2011
Work moving ahead
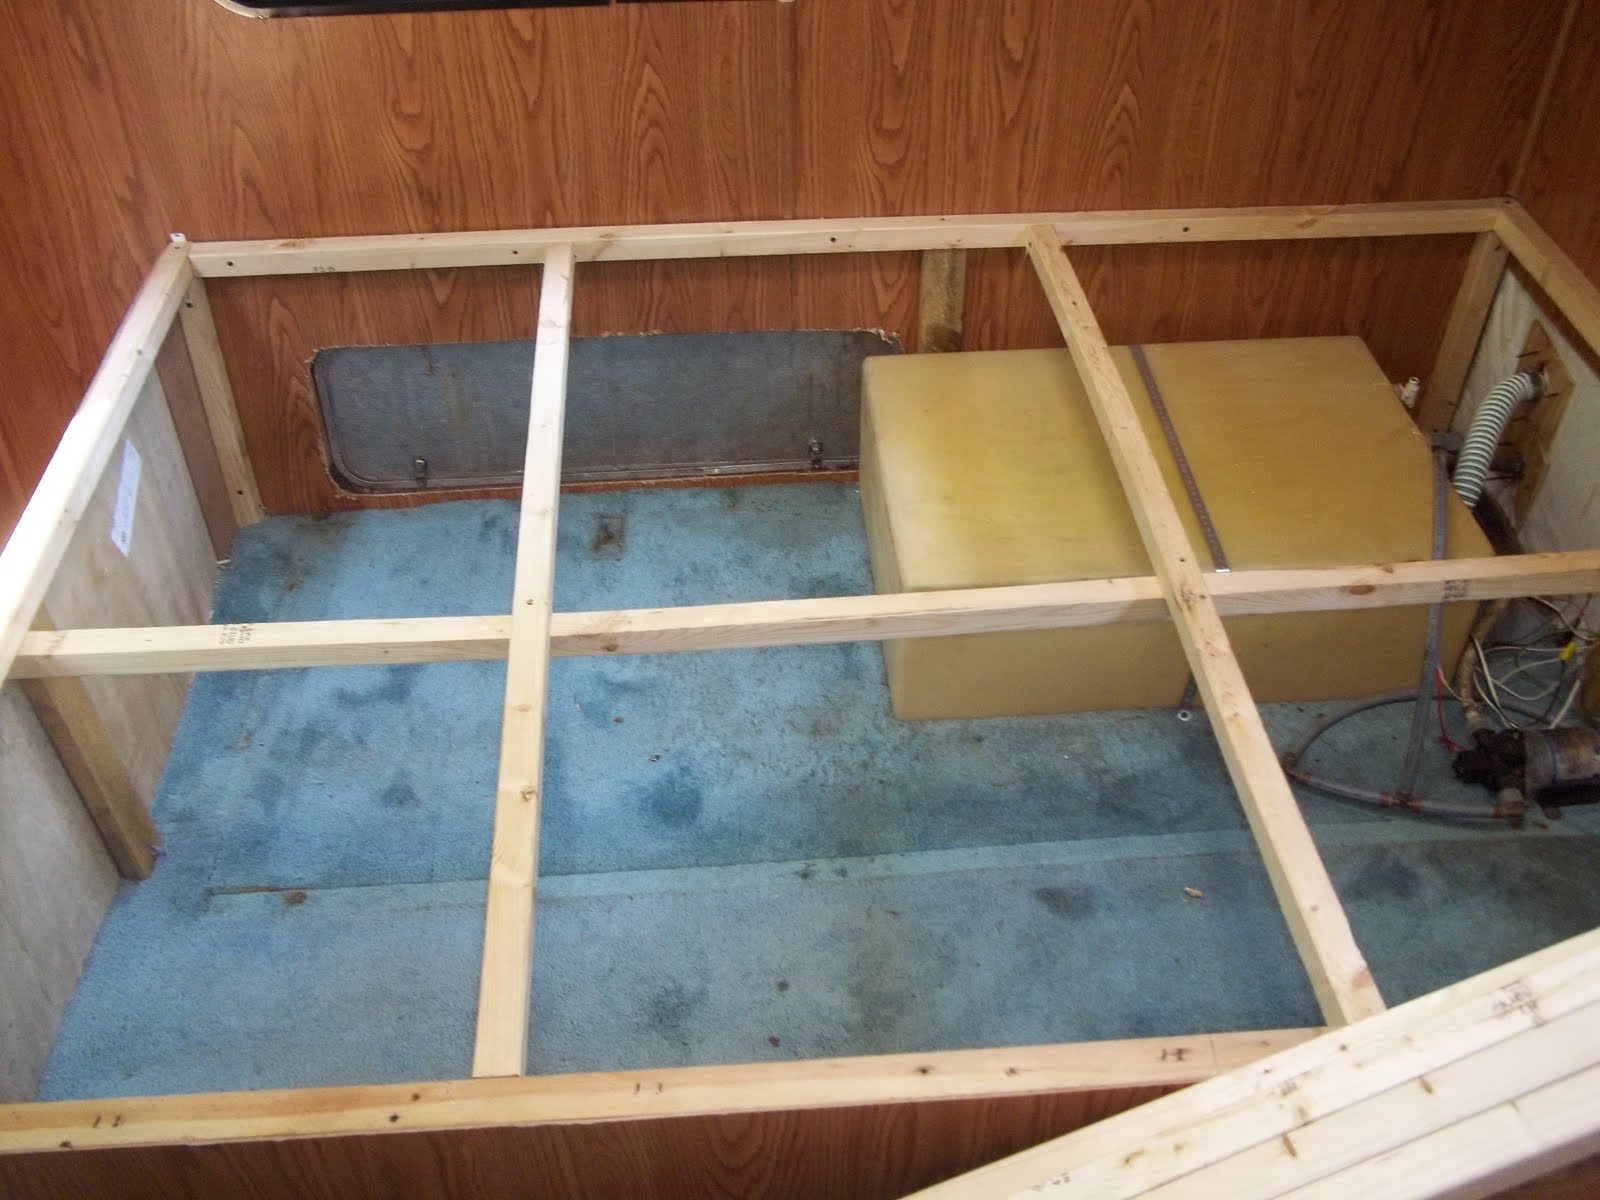
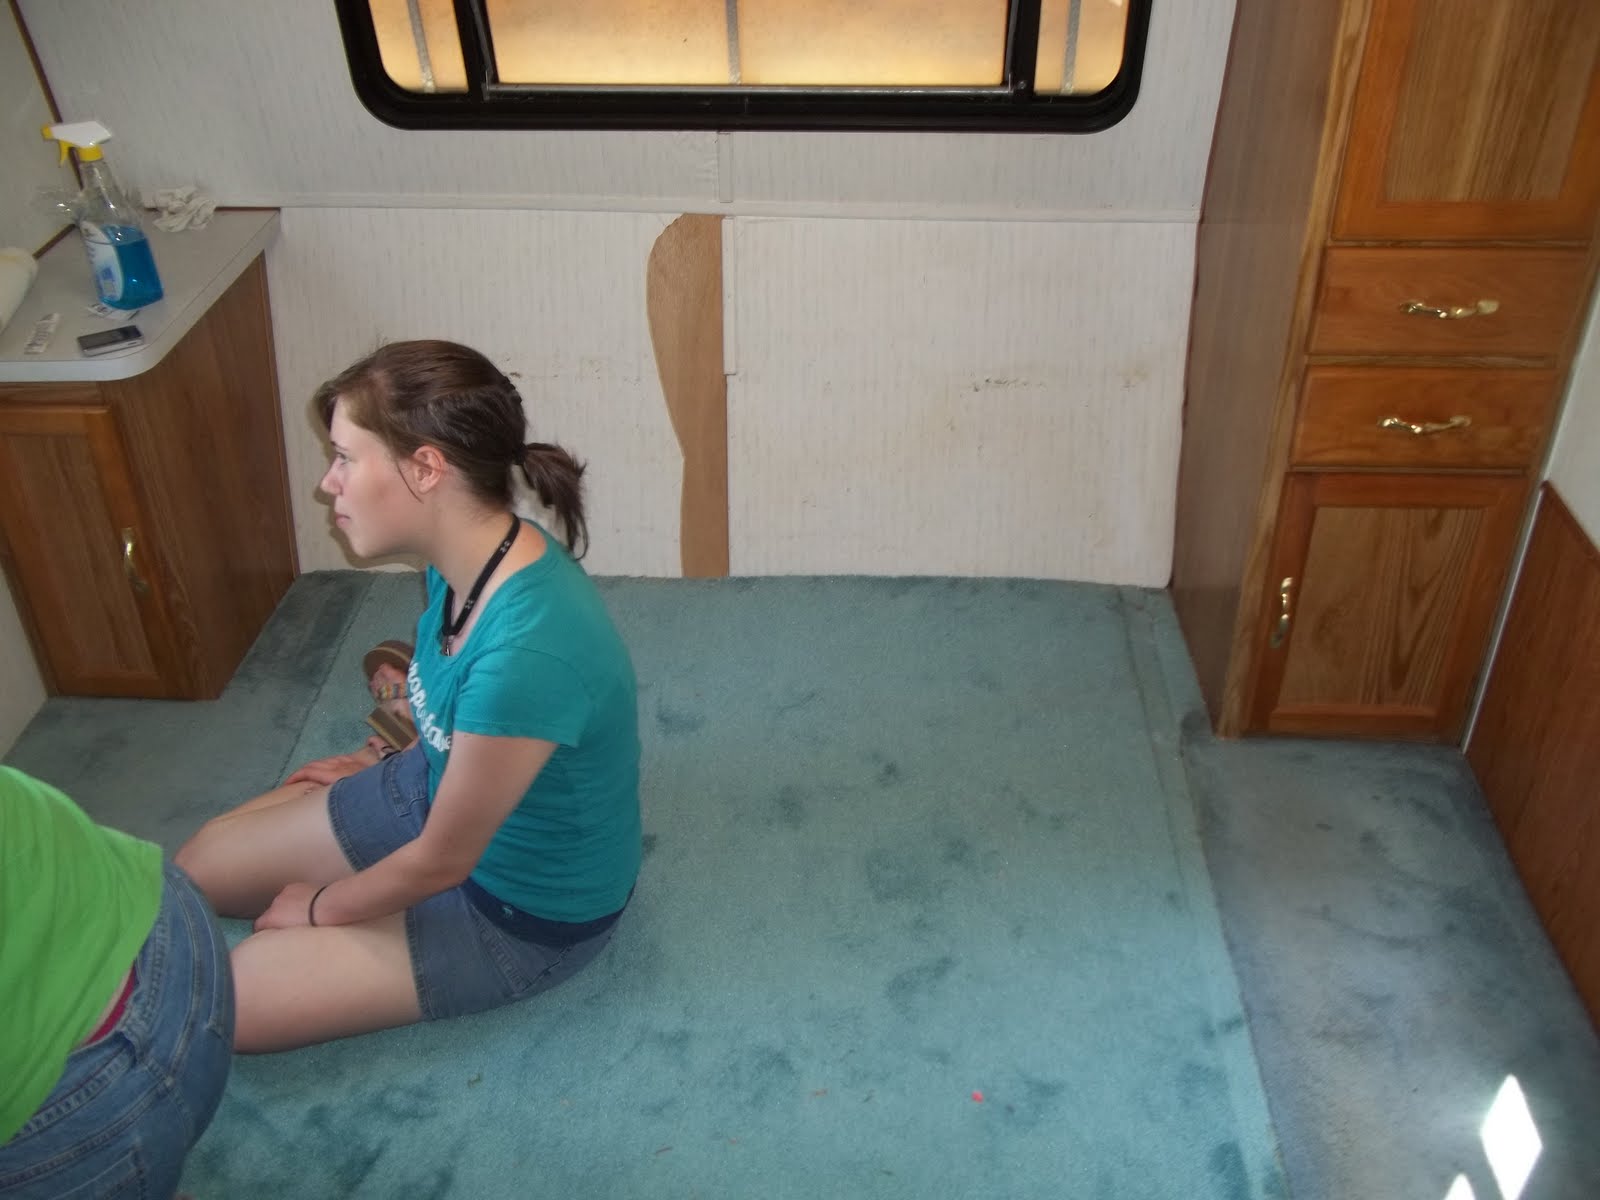
Today we made more progress getting our camper ready. We finished removing the bed frame from the front room, and built a new bed frame in the back room. Lisa and our niece also covered the windows in the front room, with window film that lets in light, but you cannot see through. We did this because as we have said before, the front room is going to be our home office. We are planning on putting two desks and PCs in it, so we wanted the light, but didn't want people to see the computers. I built a bed frame for a queen bed and hinged the top so we could access it from unside. It was not very hard to do, I used 2 x 2s for the framing to keep down the weight, and the saved paneling from the frame that was in the front room to skirt it. The only problem I had was the heater vent in the floor. I took care of this by building a box that would redirect the air and still have to cut the vent hole in the side of the frame skirt. I used some 1/4 plywood for the box and insulated it with insulation board on the inside. Basically building a duct, that goes out the side of the bed frame. Then I used 15/32 inch plywood for the top, and hinged it so I could have access. The fresh water tank and the water pump are under this bed as well as extra storage. Now instead of accessing the water pump from the small outside access door, I can raise the bed top and have plenty of room. Hope you enjoy the picture, we'll keep posting as the work progresses.


 Have fun and Happy Rving.


Subscribe to:
Posts (Atom)