Well the 6.6 cubic foot refridgerator in our camper went out yesterday, they have a hard time keeping up in the heat here in Florida anyway. This is usually a problem for us full-timers because the exact replacement models are about 1500 dollars, and take up to 5 days to order. There is a way to get around this if you are not worried about being able to run the fridge on propane. And that is to replace it with a normal refridgerator. You can get apartment sized refridgerators that are between 4 and 10 cubic feet. They are very similar in size and will work great in an RV. We put in a 10 cubic foot Magic Chef for 450 dollars. The only modifications we had to do was to remove the trim piece on the cabinet over the old fridge, and slide in the new one. Then we just had to plug the propane line and check it for leaks. Since the new one does not work on evaporation, it is able to cool more efficiently than the duel fuel models. I will post pictures later, it was late last night when we found out, and we got home from Home
Depot with the new one about 10:30, wasn't finished with the install till midnight.
Till next time,
Have fun and Happy RVing
Friday, September 16, 2011
Sunday, August 28, 2011
Interesting lessons learned
We've been in the RV now for 1 month, during which time we've learned some very valuable lessons. One, if your turn on both computers and try to make coffee you trip the breaker. Two, the water heater will also trip the breaker if both computers or the coffee pot is on. There have been several lessons like this that we have learned to overcome. We've learned to adapt, we check to see what is on before washing dishes, or using the coffee pot. Just some little tidbits to those who may be considering this lifestyle. You will all have little things that you don't normally think about, but will learn to pay attention to. You have to be creative on your storage space too. I am not trying to discourage anyone, just give you fair notice. No matter how well you plan, you will always have issues arise. It's not a bad way to live, in fact here in Florida, it is very much a normal way of living. We were very suprized to learn just how many people live in RVs fulltime. It's considered normal here, and about one third of the population live in RVs. Not to mention those who live in conventional mobile homes.
For the most part it has been pretty uneventful since moving in. I have several things i'm going to upgrade such as the AC, and Power Supply, as soon as money allow. I will be posting those upgrades as soon as possible.
Till next time,
Have Fun and Happy RVing
For the most part it has been pretty uneventful since moving in. I have several things i'm going to upgrade such as the AC, and Power Supply, as soon as money allow. I will be posting those upgrades as soon as possible.
Till next time,
Have Fun and Happy RVing
Friday, August 19, 2011
Catching up
Sorry I haven't updated this blog in a while. Things have been hectic around here. Lisa started Florida A&M School of Law, so she's been pretty busy. I started Roadmasters Drivers School to get my CDL, so i've been pretty busy. Things are going good I should have my CDL license by next Friday and have a job lined up. There are so many things to tell you all I don't know where to start. I will try and organize it and will update the blog over this weekend. We've learned some interesting things, as well as had some fun since moving to Florida. I'll let you know all about it by Monday,
Till then Have Fun and Happy RVing.
Till then Have Fun and Happy RVing.
Wednesday, August 3, 2011
Grand totals
Ok, after all the repairs are made and the unexpected items are finished, we ended up spending a grand total of $6891.46 dollars on our camper. This includes the unexpected AC unit as well as every penny spent on the camper. Not bad compared to the initial costs of a home or even renting an apartment. Not to mention the long term goal of lower monthly bills. The average price of an apartment here in Orlando is about $1000 dollars a month, plus utilities. Our lot rent including utilities is only $424.75 per month. This will equal a savings of $6902 dollars a year not counting the utilities saving of approximately 500 dollars a month.
This is the reason we chose to live in an Rv to start with.
There are some things you have to prepare for. Rv's don't have the space of a house, even with all the planning we did. There are some things that take time to get used to. Cooking for example, the kitchen is small and there isn't room to have four or five pots on at the same time. Meals have to be planned not only because of cooking space, but space for groceries. You have to really plan your shopping trips, and know where everything is going before you purchase it. You will find yourself at the store thinking I'd like to get that, then the next thought will be, where am I going to put it. Another problem is you cannot have everything on at once. Most RV's have a thirty amp service. While this is not normally a problem, you have to think about it, we've found that if you use hot water, like washing dishes, then turn on the coffee pot while the water heater is heating along with the AC the breaker will trip. While this is only a minor thing it's something you have to always think about. I am planning to upgrade the main power center to a 50 amp service in the next couple of months, so look for that.
While it is a little cramped, it's not as bad as either of us expected. Overall our first week and a half in an RV fulltime has been pretty uneventful. We spent most of our time taking care of the usual moving tasks. We got our licenses changed to Florida. added insulation to the windows and roof vents, and unpacking. We've been trying to get ready for next week. Lisa starts Law School and I start school for my CDL license.
That's it for now, I'll post more this weekend.
Till then Have fun and Happy Rving.
Monday, August 1, 2011
AC problems and cheap fix
Ok, we had the AC serviced before we moved. The service technician said there was a sensor that was bad but he could bypass it and get the ac to work. It works great, with one problem, the sensor kept the ac unit from freezing up. Now after it has ran about 5 hours it freezes and kicks off the main breaker. Because of the age of the ac unit, cannot get a replacement sensor. A new unit costs about 900 dollars. With this information I chose to put in a window unit instead. I purchased a 12,000 BTU window unit on sale at Lowes for 300 dollars, along with some expanding foam insulation, and some wood trim. Don't worry about putting in a window unit, like i've said in an earlier post, most campers with people living in them full time have many imaginative upgrades. There are about 50 in the park we are in with window units.
First remove the louvered window panes. Then remove the opening machanisms by drilling our the rivets that hold them in. Sorry I don't have pictures of this. Lisa was unpacking while I installed the unit. There are only 4 to 6 rivets that hold the mechanisms in. Then install the window ac unit like you would in a house. If you have never installed a window unit, read the instructions, it is pretty strait forward.
After the unit is installed install the trim on the inside. I fit it around the window unit like a picture frame. you may have to rip the moulding down to the proper width, depending on the type of windows in your camper.
I then sprayed in the expanding foam insulation from the outside, allow it to dry and expand overnight, otherwise it will push off the trim. After dry cut off any insulation that has expanded outside the wall, and cover the outside with trim just like the inside. Next caulk all edges of the trim on the outside and paint to match the camper.
AC unit after finished.
 This is also a good idea if your rooftop unit doesn't cool the camper as well as you'd like. Or if like my you like to be cooler at night while your sleeping.
First remove the louvered window panes. Then remove the opening machanisms by drilling our the rivets that hold them in. Sorry I don't have pictures of this. Lisa was unpacking while I installed the unit. There are only 4 to 6 rivets that hold the mechanisms in. Then install the window ac unit like you would in a house. If you have never installed a window unit, read the instructions, it is pretty strait forward.
After the unit is installed install the trim on the inside. I fit it around the window unit like a picture frame. you may have to rip the moulding down to the proper width, depending on the type of windows in your camper.
I then sprayed in the expanding foam insulation from the outside, allow it to dry and expand overnight, otherwise it will push off the trim. After dry cut off any insulation that has expanded outside the wall, and cover the outside with trim just like the inside. Next caulk all edges of the trim on the outside and paint to match the camper.
AC unit after finished.

Finally finished
Ok, finally finished with the unpacking and wanted to share some pictures of our camper all unpacked. We have a grapefruit tree in the front of the lot, right past our awning, internet says they get ripe in November. We also have a beautiful flowering shrub, not sure what it is but the flowers are amazing.
Our grapefruit tree.

Our beautiful flowering shrub.

Now some pictures of our camper after all the unpacking is finished.
TV in the living area. I know it's a little big, but I am still a guy.


Extra insulation
First off no one tells you but you should insulate the roof vents if nothing else. This simple thing will help with the cooling more than you could imagine. And it is easy to do, you can purchase foil sided, roll insulation like in the following pictures from any home improvement store for about 25 dollars a roll. One roll will cover all the vents and most of the windows in an average size camper. And don't worry about how it looks, here in Florida you can tell if someone lives in their camper simply by looking for the extra insulation. Almost all the Rv's, even the luxury class A's have it on every window, door, vent, etc. There are many ways to install it. double sided tape, velcro tape, screws, nails, etc. And when the weather cools off in the fall you can always remove it. Although it doesn't look as nice as the large glass windows, it blocks out almost all the heat. Besides our camper was a 1993 with the louvered windows, and they never seal up completely. So with the addition of insulation we've stopped almost all the AC loss and kept out 95 percent of the heat. The AC does not run constantly anymore. I do recommend that you put it between the doors and screens. it looks better there.
Here is a picture of the door.

This is the roof vents, they are all done the same.


Saturday, July 30, 2011
Ok, the move is officially over
Some more lessons learned this week. Florida charges a flat fee called an impact fee for each vehicle on the road. This fee is approximately 500 dollars per vehicle, and must be paid to get the tags. Also they charge 55 dollars per person for license transfers. So anyone thinking of moving to Florida should make sure to budget these amounts. Also Florida does not accept Alabama CDL's if transfering this license, you will have to retake both the written and the driving tests.
This has been a long week, moved last Saturday, been unpacking and getting things set up, such as internet service. Finally the unpacking is over and we are connected again to the internet. Looking forward to taking a break for a couple days.
We took care of the important things, changing address, licenses, and getting internet. Also had to do some insulating. If your planning to move to Florida, take the time before hand to insulate the roof vents and any unnecessary window, this will help the AC. Otherwise plan on the AC running constantly. There have been some minor setbacks this week. I will discuss them later in my next blog. Have to get pictures ready first. Till next time.
Have fun and Happy Rving.
Friday, July 22, 2011
Moving
Ok, finally finished all the work, will post the awning update next week. Will be offline for about a week maybe to. Moving tomorrow. Send pics and new post as soon as internet is up.
Wednesday, July 13, 2011
Finding a long term RV park
Ok, we went to Orlando this week. We found several long term RV parks online, and decided to go down and check them out in person, since we are fairly close. Good thing we did. Of the six we found, three where out right off. One piece of advice is to always do plenty of research on the park you are thinking about. There was one we considered that ended up being in an area with a really bad crime rate, and two were practically inaccessable do to traffic. Good to find these things out before your make a reservation, especially for long term.
We did narrow it down to three. Of which Winter Garden RV Resort is by far the best, it not only has the most amenities, but is in the best part of Orlando. The other choices are Lake Breeze and Lost Lake. Both of which are pretty nice parks, one is just a little farther out than we wanted to be, and the other one is crouded.
One thing we really liked about Winter Garden is that they require background checks for all there long term residents. Some automatic disqualifications are crimes agains persons, and theft. So we are waiting the hear back from them, when our background checks are done.
Have fun and Happy RVing.
Brakes and Tires
Ok, since last post I have changed the tires and brakes on the camper. The tires are like any others, take them off and go to a tire shop and purchase new ones. They will mount and balance them, then you just have to put them back on. One of the tires from our camper.
![]() While the tires are off you should inspect your brakes. Our camper had a bad magnet on one of the brakes. Most of the time if your brake controller shows an over current or a short, you should start by checking the magnets that work the brakes. The magnet and pads cost about $65 dollars per wheel. The entire brake assembly is usually cheaper, ours were only $55 dollars each. And it is easier to replace the entire assembly, than just the pads and magnets.
While the tires are off you should inspect your brakes. Our camper had a bad magnet on one of the brakes. Most of the time if your brake controller shows an over current or a short, you should start by checking the magnets that work the brakes. The magnet and pads cost about $65 dollars per wheel. The entire brake assembly is usually cheaper, ours were only $55 dollars each. And it is easier to replace the entire assembly, than just the pads and magnets.
You should first gather all the tools you will need, to replace the brake assembly you will need, a wrench that fits the four nuts on the back of the assembly, a small hammer, a set of adjustable pliers, a set of wire pliers, a flat screwdriver, a bearing packer, a jack, and lug wrench.
![]() Start by taking off the tires, then you can start removing the brake drums. To do this remove the bearing cover, it is the dome shaped cap in the middle of the brake drum. Then remove the carter pin and the king nut from the spindle. The king nut should only be hand tight.
Start by taking off the tires, then you can start removing the brake drums. To do this remove the bearing cover, it is the dome shaped cap in the middle of the brake drum. Then remove the carter pin and the king nut from the spindle. The king nut should only be hand tight.
![]()
![]()
![]()
![]() Ok, so you have everything off, you can take one old assembly to the nearest RV dealer or parts store and purchase new ones. A really good parts store in the Atlanta area is K&C RV in Dallas, Ga. they have most everything in stock. As well as reasonable prices. Make sure you inspect your drums as well as the assemblies. If they are scratched or pitted inside or have groove on the inside replace them, you should also check your bearings for signs of wear, such as flat spots or discoloration on the bearings. I was lucky and my drums and bearings where in good shape. This is what a good used drum should look like.
Ok, so you have everything off, you can take one old assembly to the nearest RV dealer or parts store and purchase new ones. A really good parts store in the Atlanta area is K&C RV in Dallas, Ga. they have most everything in stock. As well as reasonable prices. Make sure you inspect your drums as well as the assemblies. If they are scratched or pitted inside or have groove on the inside replace them, you should also check your bearings for signs of wear, such as flat spots or discoloration on the bearings. I was lucky and my drums and bearings where in good shape. This is what a good used drum should look like.![]()
![]()
![]()
![]()
![]()
![]() Then replace the outer bearing, king nut, cotter pin, dust cap, and replace the tires. Your all finished.
Then replace the outer bearing, king nut, cotter pin, dust cap, and replace the tires. Your all finished.
![]()

You should first gather all the tools you will need, to replace the brake assembly you will need, a wrench that fits the four nuts on the back of the assembly, a small hammer, a set of adjustable pliers, a set of wire pliers, a flat screwdriver, a bearing packer, a jack, and lug wrench.


After you remove the king nut, slide the brake drum forward slightly and remove the outer bearing, DO NOT GET ANY DIRT OR CONTAMINATES IN THE BEARING. Then slide the brake drum off the spindle, again taking care not to get any dirt in the inner bearing which will be on the inside of the drum. This bearing is held in place by a grease seal. Also do not get the drums mixed up, unless you are replacing them mark which spindle they came off of with a permanent marker.
Once the drum is removed you can inspect the brakes. This is when you can check your magnets for wear if no wear is visible you can connect a volt meter in series and check for continuity. This is what mine looked like with the drums removed. Since these where the original brakes I decided to change them all.

The next step is to disconnect the two wires from the brake assembly, you can cut them with the wire cutters, just make sure you leave as much wire connected to the trailer wiring as possible. You can always remove more, but it is hard to add if you make it to short. Then you can remove the four nuts on the back holding the assemblies on. This is what the spindles will look like once the brake assemblies are removed.

 Ok, so you have everything off, you can take one old assembly to the nearest RV dealer or parts store and purchase new ones. A really good parts store in the Atlanta area is K&C RV in Dallas, Ga. they have most everything in stock. As well as reasonable prices. Make sure you inspect your drums as well as the assemblies. If they are scratched or pitted inside or have groove on the inside replace them, you should also check your bearings for signs of wear, such as flat spots or discoloration on the bearings. I was lucky and my drums and bearings where in good shape. This is what a good used drum should look like.
So I purchased four brake assemblies, and four bearing seals. The seals are not reusable and have to be replaced when the bearings are removed and repacked with grease. Next you can start putting the brake assemblies back on. Make sure you put the ones marked left on the drivers side of the camper and the right ones on the passenger side. Place them over the spindles and tighten the nuts you removed from the old ones. Next connect the wires to the magnets, it does not matter which wires are connected to the ones on the camper. They just form a continuous loop, as long as they are connected. I prefer to use the Scotchlock connectors, but you can use wire nuts. Once the wires are connected your assemblies should look like this.

Next we will repack the bearings and replace the grease seals. Then all that is left is to replace the drums and tires and your finished. I recommend doing the drums one at a time. First remove the grease seal on the inside of the drum, then use a bearing packer to repack the bearings. Being sure keep the outer and inner bearings seperated.
Bearing packer

Old bearing before repacking.

This is the bearing after repacking.

Once the bearings are repacked with grease, you can put the inner bearing into the inside of the drum and replace the grease seal. Make sure the seal is square to the hole in the drum and use the hammer and a block of wood to drive the seal into place. The grease seals should be slightly recessed in the drum when installed. 
After the seal is in place you can replace the drum on the spindle.


Have fun and Happy RVing.
Friday, July 1, 2011
Sagging steps
One thing I have notices is that there are several products on the market to prevent the folding steps from sagging. Most are legs that go under the steps and have to ge adjusted every time the camper is moved. After looking at the problem and the many options on the market I came up with my own idea. Almost all the campers I looked at had the steps installed in the same way. I understand that the different manufacturers use standard steps. This very practice is the reason the steps sag. The steps are made to fit many different models of campers so there is a space between the rear of the steps and the frame. Most are only attached to the floor of the camper which puts alot of stress on the connecting hardware as well as the floor.
To fix this problem I used two pieces of one inch aluminum angle, which can be purchased at any warehouse store like Home Depot or Lowes. And four 1/4 inch bolts that where one inch long.
You have to have the camper leveled and then level the steps. Once the steps are level measure the distance between the rear of the steps and the frame. Add about four inches to this measurement, for attachement hardware. Then cut your angles, aluminum angle can be cut with a hacksaw, skill saw, or miter saw (NO SPECIAL BLADES NEEDED). Then clamp the angles into place, making sure they are placed all the way to the frame bridging the gap. Drill two holes in each side for the bolts, install bolts, and tighten.
The finished fix will keep the steps on the same level as the camper without any extra adjustments. It also made the steps much more stable, and was cheaper than any of the products on the market. In all it took about one hour to complete, and cost about ten dollars.
![]()
To fix this problem I used two pieces of one inch aluminum angle, which can be purchased at any warehouse store like Home Depot or Lowes. And four 1/4 inch bolts that where one inch long.
You have to have the camper leveled and then level the steps. Once the steps are level measure the distance between the rear of the steps and the frame. Add about four inches to this measurement, for attachement hardware. Then cut your angles, aluminum angle can be cut with a hacksaw, skill saw, or miter saw (NO SPECIAL BLADES NEEDED). Then clamp the angles into place, making sure they are placed all the way to the frame bridging the gap. Drill two holes in each side for the bolts, install bolts, and tighten.
The finished fix will keep the steps on the same level as the camper without any extra adjustments. It also made the steps much more stable, and was cheaper than any of the products on the market. In all it took about one hour to complete, and cost about ten dollars.

Toilet valves
Sometimes you have to do a job that while not very hard or expensive is just plain crappy. Our toilet valve was leaking, you can tell it is the valve because it will only leak when the toilet is flushed. The valve only cost fourteen dollars, and takes approximately one hour to install. One piece of advice is to empty the black water tank first, because you have to remove the toilet.
![]() The toilet removes like most house toilets, turn off water supply, remove the two nuts at the bottom. Ours was a Thetford toilet so the nuts are half inch. You can use a half inch wrench or socket, if using a socket you will need a swivel. Once the toilet is removed, take it ourside and turn it upside down.
The toilet removes like most house toilets, turn off water supply, remove the two nuts at the bottom. Ours was a Thetford toilet so the nuts are half inch. You can use a half inch wrench or socket, if using a socket you will need a swivel. Once the toilet is removed, take it ourside and turn it upside down. ![]()
 The toilet removes like most house toilets, turn off water supply, remove the two nuts at the bottom. Ours was a Thetford toilet so the nuts are half inch. You can use a half inch wrench or socket, if using a socket you will need a swivel. Once the toilet is removed, take it ourside and turn it upside down.
 You can then get to the screws (two on the Thetford brand) that hold the valve on.

Once the valve is replaced you can reinstall the toilet. Make sure to use a new flange seal when reinstalling the toilet, this seal comes with the valve. Put the seal down, place the toilet on top of seal, and retighten the two nuts, and reattach water line. Then check for leaks by turning the water back on and flushing the toilet.
Have fun and Happy RVing.
Fixing Corners
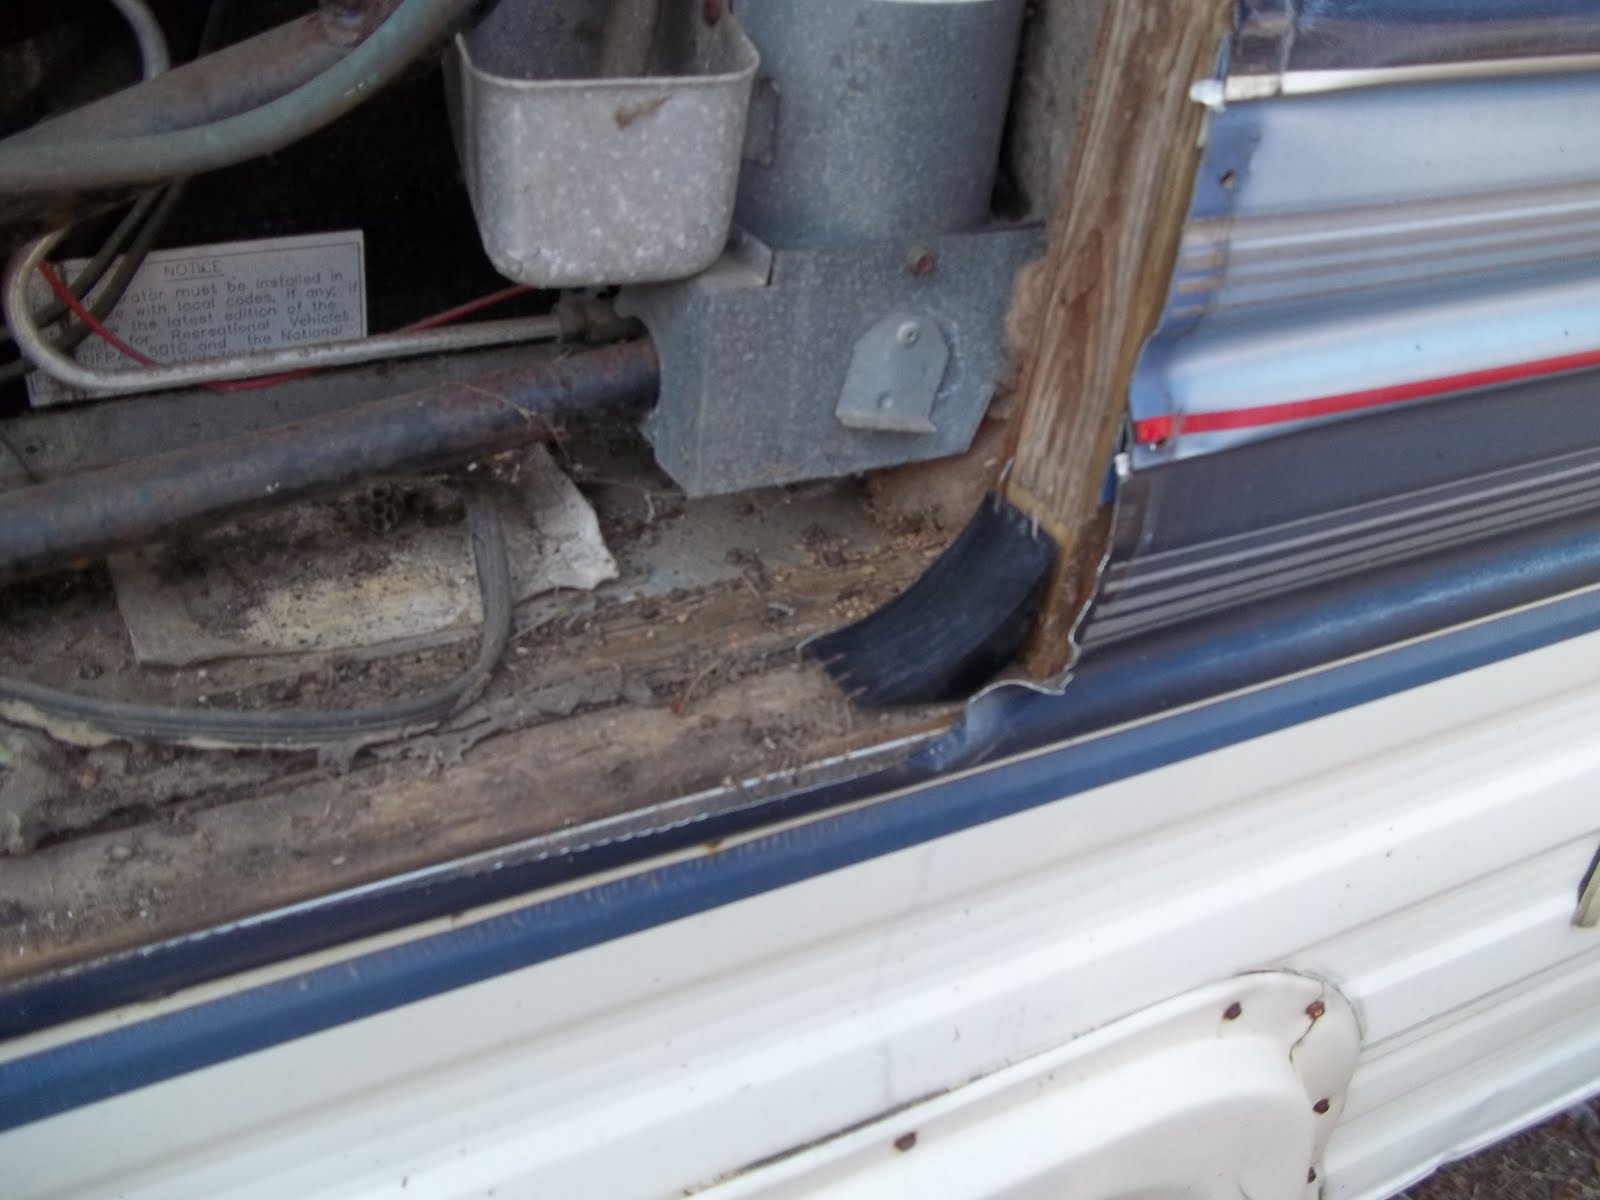
This week we tackled the second largest project on our camper. The previous owner had made some repairs on the rear corners of the camper, and due to the poor job of caulking, I was worried about the repairs being correct. After some initial examinations I learned they where not. So this week we tackled repairing the rear corners correctly.
This was what they looked like when we started. You can see the caulk smeared around the seams. What worried me was not only the overall look, but the caulk was pulling away from moulding and permitting water to get behind it.

Then first step was to remove the mouldings.


This is what the corner looked like with the moulding removed. Notice the large gap between the side and end panels.

Next we removed all the old caulk on the sides with a plastic putty knife, this way we didn't scratch the paint on the Rv. Then we repaired the corners, there was some water damage so we had to use longer screws and in a couple of places had to replace a small piece of 2 x 2 lumber. The 2 x 2 stock was purchased at the local Home Depot and cut to fit. Be careful when pulling back the sides, to get it into place, or you will bend the siding. After the bad wood was replaced the siding was screwed back into place.

 This is what the corner looked like after the repairs had been made and it is ready for the moulding. Notice the new wood visible on the corner, and there isn't much gap between the panels.
Next we prepaired the moulding by scraping off the old putty and caulk.

Then we put new putty tape on. I used the grey putty tape, make sure you put on enough to cover the moulding. This is what seals the joints and makes them waterproof.

The next step is to reinstall the moulding, starting at the top and working down. Be sure you keep the moulding tight to the sides as you put it on, since there are not screws in the sides to pull it up.


Considering the cheapest mobile repair in atlanta is 85 dollars an hour, by doing it ourselves we saved at least $382.50, not bad for half a days work. This is something anyone can do with a few simple hand tools, and the rewards are more than the savings. There is a lot of satisfaction at seeing the fruits of your labors.
Till next time,
Have fun and Happy RVing.
Wednesday, June 22, 2011
Called in the pros
Well this week we made some real progress, but we did have to call in the pros. We had a specialist come in to service the AC and Fridge. Even though I hate to admit it, I am not a refridgeration expert, so we called in RBI Mobile RV repair. Roger is a very knowledgeable person, and the rates are well worth the cost. This is one piece of advice I can give. Even when working on a budget, like we are, it is better to pay someone who can fix it right the first time. Than to spend hours and still possibly have to pay for repairs. Roger got the AC working and checked the fridge, as well as provided wonderful information. Just be sure to check some references for the person you are going to have work on your RV. The good news is that all the major appliances work, we now have good AC, fridge gets cold, and the water heater heats the water. We did have to replace the heating element in the water heater. I want get into the details because this is a very simple fix, turn off power, remove two wires on the heating element, unscrew the element, and replace in the same order. Remembering to fill the water heater and check for leaks before turning on the power. We also finished all the minor issues. Keep checking because next week I will have an interesting project.
The best news is that we are on schedule to move July 23, 2011. Coming up I will be showing you how to repair damage to the corners, replace the brakes, and replacing an awning.
Have fun and Happy RVing.
The best news is that we are on schedule to move July 23, 2011. Coming up I will be showing you how to repair damage to the corners, replace the brakes, and replacing an awning.
Have fun and Happy RVing.
Sunday, June 19, 2011
Sorry for not updating last week
I just wanted to say I am sorry for not updating this blog last week. We really didn't do to much. A local RV dealer was having a going out of bussiness sale, everything was at cost, so we went ahead and finished getting everything we needed to finish. I will be working on it again this week and hope to have more good information. The date is set for us to move into our rig on July 23, 2011. So hopefully the technical stuff will be finished then, except for the occasional repair. The good news is that hopefully most of the blogs will be about our adventures. Again sorry about the delay.
Have fun and Happy RVing.
Have fun and Happy RVing.
Wednesday, June 8, 2011
Replacing an access door
We also had to replace the access door to the refrigerator. First remove the old door by removing all the screws holding it on and pull it off.

Then measure the opening between the framing both height and width. You will have to buy the replacement door to fit this opening. Because of the age of our camper we could not find an exact replacement, so we found one that fit the height and width of the opening, but the corners were not as rounded as the original.

In order to make the replacement door work we had to first remove the corner radius blocks that were put in for the old door.
Then we used the new door to mark the siding so we could trim it off. Using sheet metal shears to cut the corners along the marks.


Next put the access door frame into the opening and secure with screws through the mounting holes.


Finally put the door into the frame, most new doors simply snap into place. And the job is done.

It took about half and hour to replace this door. The new door cost 40 dollars, so it isn't cheap, but most mobile technicians around here charge 85 dollars and hour and up plus parts. Along with a service call charge of 50 dollars and up just for coming out. So I saved at least 90 dollars by not having to pay the service call or labor bill. Not bad for a half hour of my time.
Have fun and Happy Rving.
Moving ahead
Today was a good day we made some good progress on the camper. And have managed to come out under budget so far. Today we replaced the propane regulator, replaced the access door on the refrigerator, checked the water lines for leaks, checked the stove for proper operation, put up new blinds, and rehung the valances over the windows.


I will start with replacing the propane regulator. Most places recommend you replace them every 10 years and since they are not expensive, ours was only 40 dollars. Most RV suppliers or dealers will have them in stock.

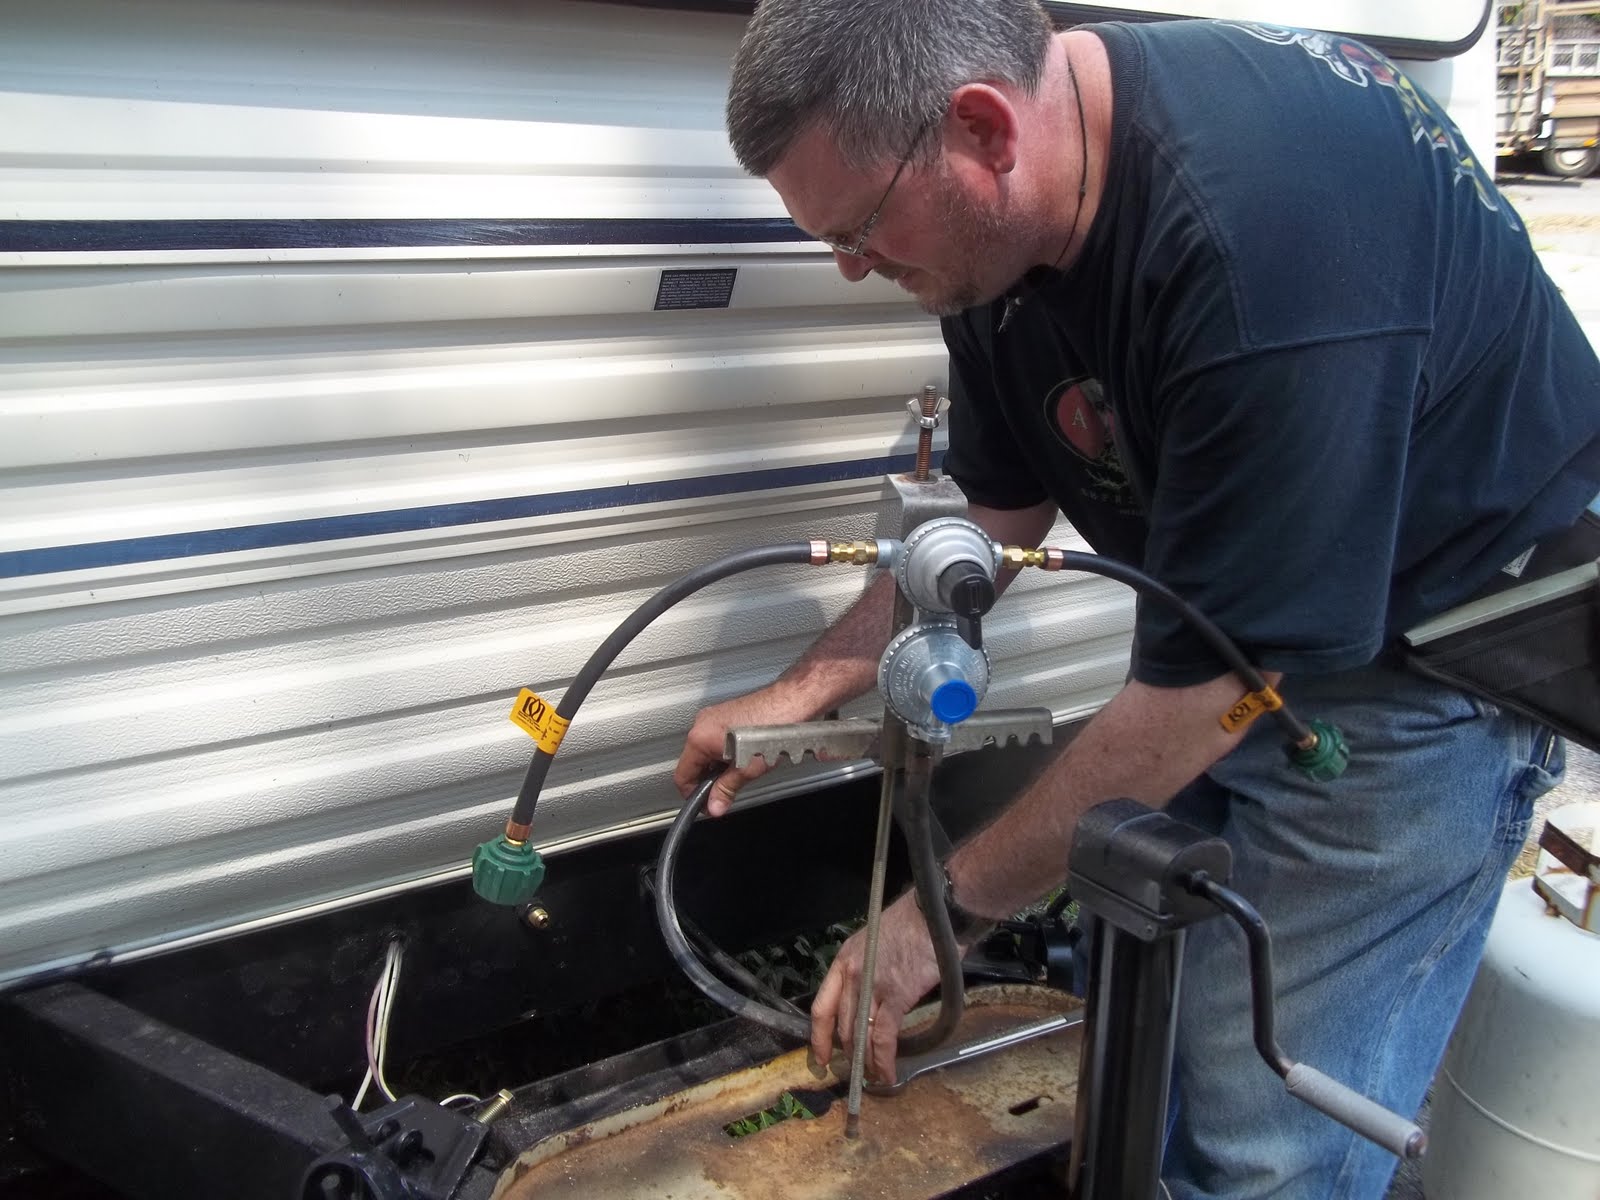
This was our old regulator, the hoses going to the tanks had to be replaced because they did not have the right fittings for the new OPD valves being used on tanks.

Our new regulator and connection hoses. Start by removing the old regulator assembly from the camper. This is really simple, there will be only one hose from the regulator to a connection on the campers frame. Your will have to unscrew this hose, most will use a 7/8 inch wrench. Then remove the wing nut on top and pull the assembly off. Next there will be a couple of screws that hold the regulator onto the mounting bracket. Mine had 2 but some have 4. You may have to drill a new hole in the mounting bracket to match the mounting hole in your regulator. Then connect the tow hoses that go to the propane tanks, the proper ports in the new regulator will be marked with arrows and inlet side. Then you replace the hose in the bottom of the regulator that connects to the camper, this will also be marked with an arrow and outlet.

Next put the completed assembly back on the camper and reconnect the hose to the fitting on the frame. Finally use a spray bottle with some mild soap and water to wet all the connections and look for bubbles forming. If your see bubbles tighten the connections. When no bubbles form the installation is complete.
Tuesday, June 7, 2011
Getting ready for this weeks progress
We went shopping today for some more supplies, in order to be ready for work tomorrow. We picked up blinds for the windows, a register vent to finish relocating the vent I moved building the bed frame, we also bought a new propane regulator, and a service access door for our Norcold fridge. We had to replace the pigtails on our regulator because of the new OPD valves used on propane bottles, since we where replacing the pigtails anyway we decided to replace the entire regulator since it is recommended you replace them every 10 years. It is a 40 dollar part and not hard to put on, I will be posting the picks tomorrow, along with the instructions. Well that's all for today, lots to come tomorrow.
Have fun and Happy Rving,
Have fun and Happy Rving,
Wednesday, June 1, 2011
Work moving ahead
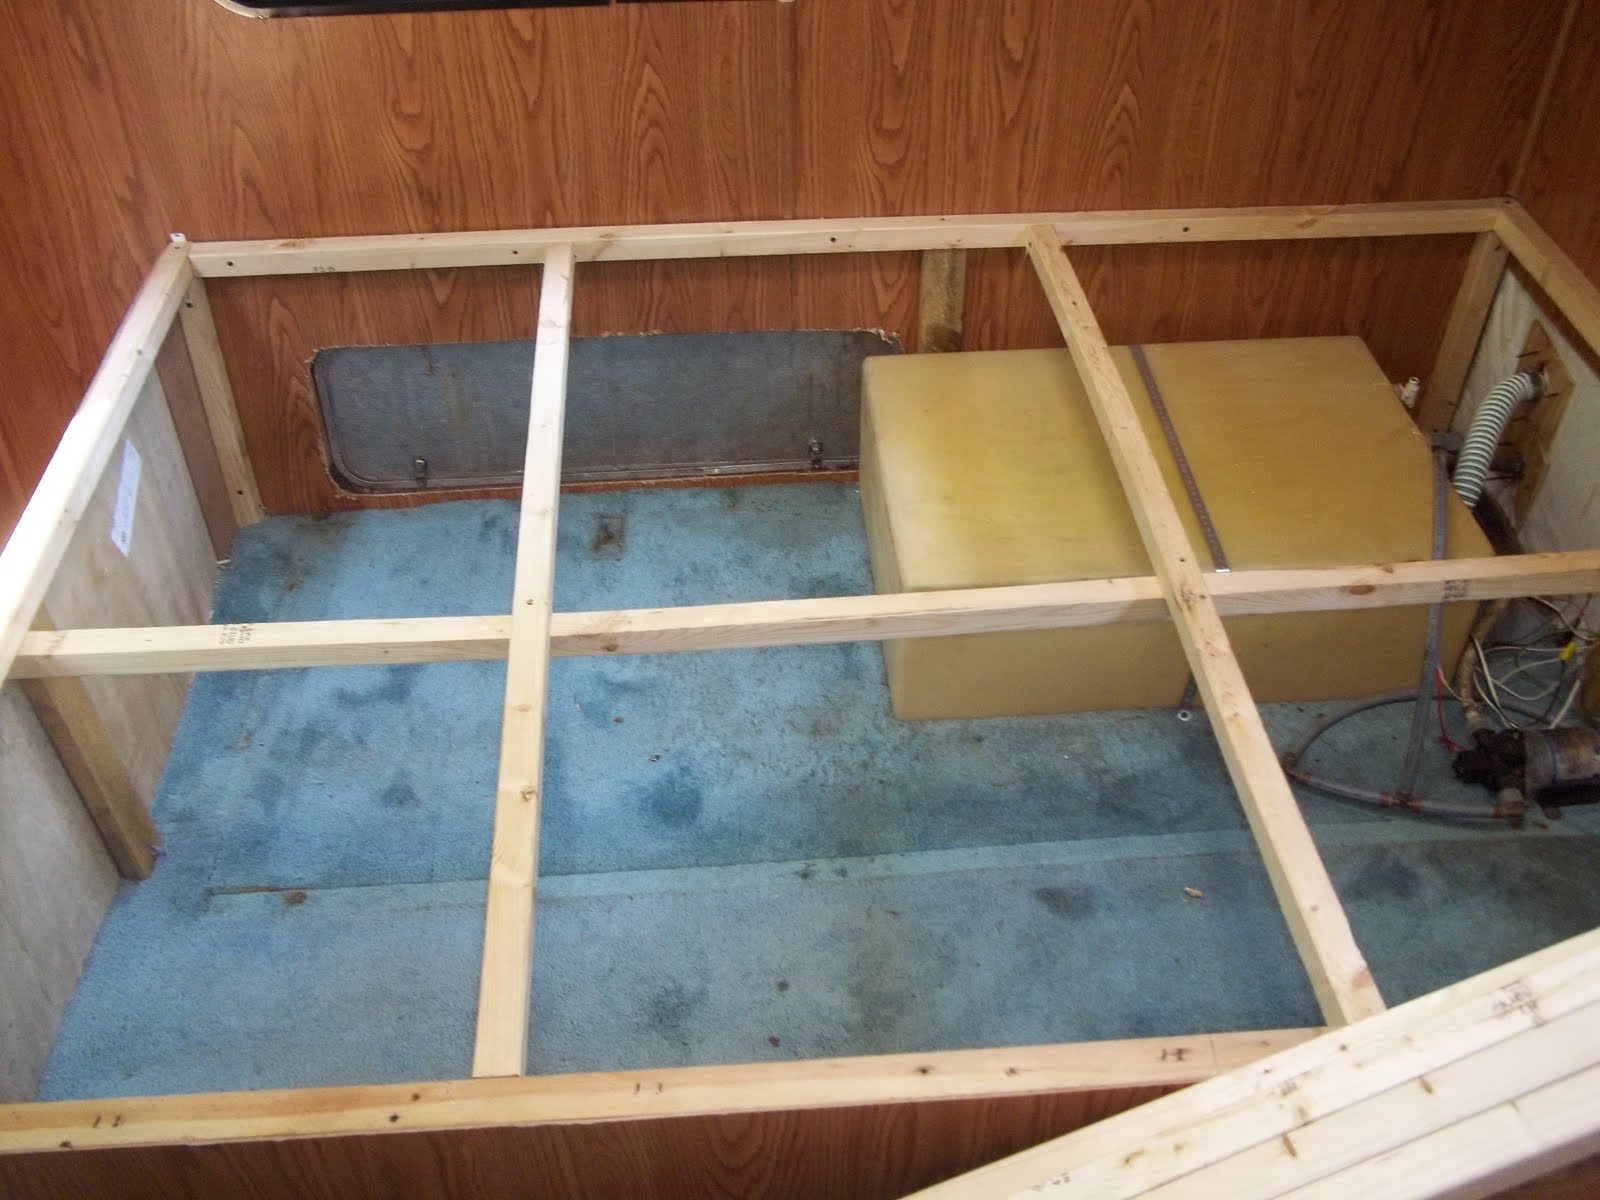
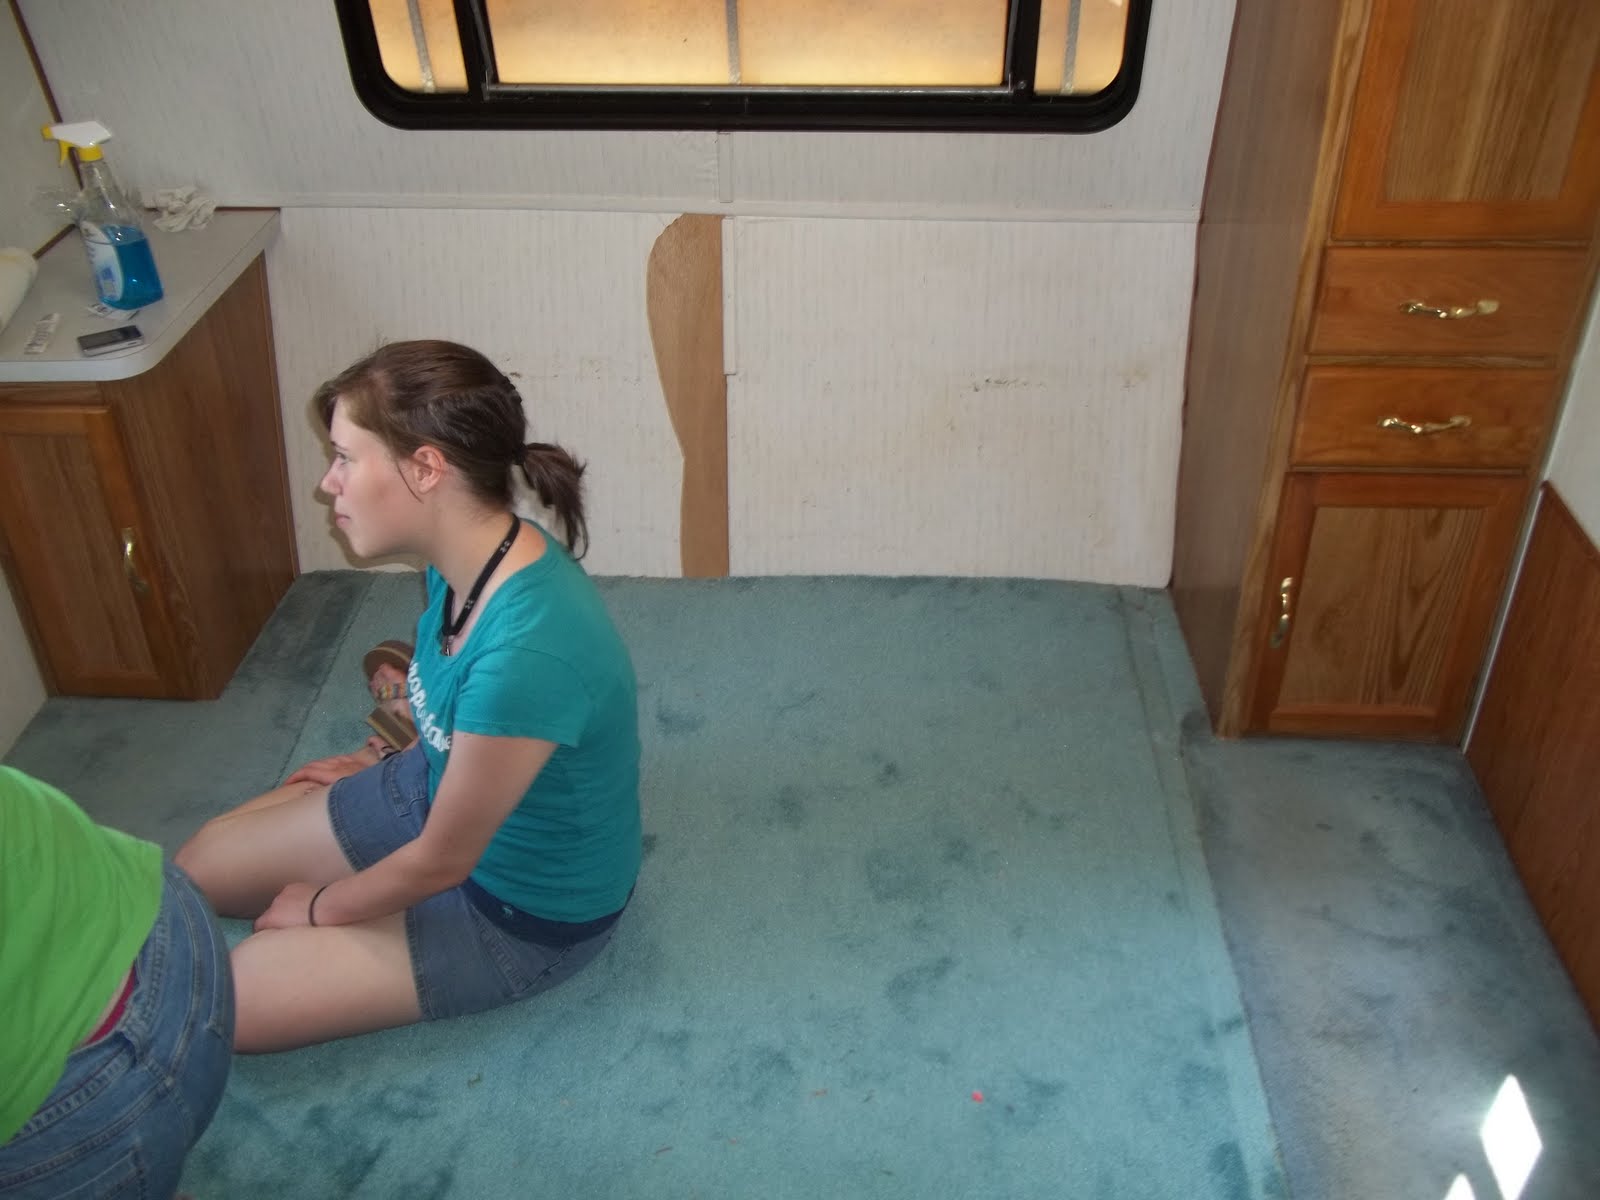
Today we made more progress getting our camper ready. We finished removing the bed frame from the front room, and built a new bed frame in the back room. Lisa and our niece also covered the windows in the front room, with window film that lets in light, but you cannot see through. We did this because as we have said before, the front room is going to be our home office. We are planning on putting two desks and PCs in it, so we wanted the light, but didn't want people to see the computers. I built a bed frame for a queen bed and hinged the top so we could access it from unside. It was not very hard to do, I used 2 x 2s for the framing to keep down the weight, and the saved paneling from the frame that was in the front room to skirt it. The only problem I had was the heater vent in the floor. I took care of this by building a box that would redirect the air and still have to cut the vent hole in the side of the frame skirt. I used some 1/4 plywood for the box and insulated it with insulation board on the inside. Basically building a duct, that goes out the side of the bed frame. Then I used 15/32 inch plywood for the top, and hinged it so I could have access. The fresh water tank and the water pump are under this bed as well as extra storage. Now instead of accessing the water pump from the small outside access door, I can raise the bed top and have plenty of room. Hope you enjoy the picture, we'll keep posting as the work progresses.


 Have fun and Happy Rving.


Subscribe to:
Posts (Atom)