I will start with replacing the propane regulator. Most places recommend you replace them every 10 years and since they are not expensive, ours was only 40 dollars. Most RV suppliers or dealers will have them in stock.

This was our old regulator, the hoses going to the tanks had to be replaced because they did not have the right fittings for the new OPD valves being used on tanks.

Our new regulator and connection hoses. Start by removing the old regulator assembly from the camper. This is really simple, there will be only one hose from the regulator to a connection on the campers frame. Your will have to unscrew this hose, most will use a 7/8 inch wrench. Then remove the wing nut on top and pull the assembly off. Next there will be a couple of screws that hold the regulator onto the mounting bracket. Mine had 2 but some have 4. You may have to drill a new hole in the mounting bracket to match the mounting hole in your regulator. Then connect the tow hoses that go to the propane tanks, the proper ports in the new regulator will be marked with arrows and inlet side. Then you replace the hose in the bottom of the regulator that connects to the camper, this will also be marked with an arrow and outlet.
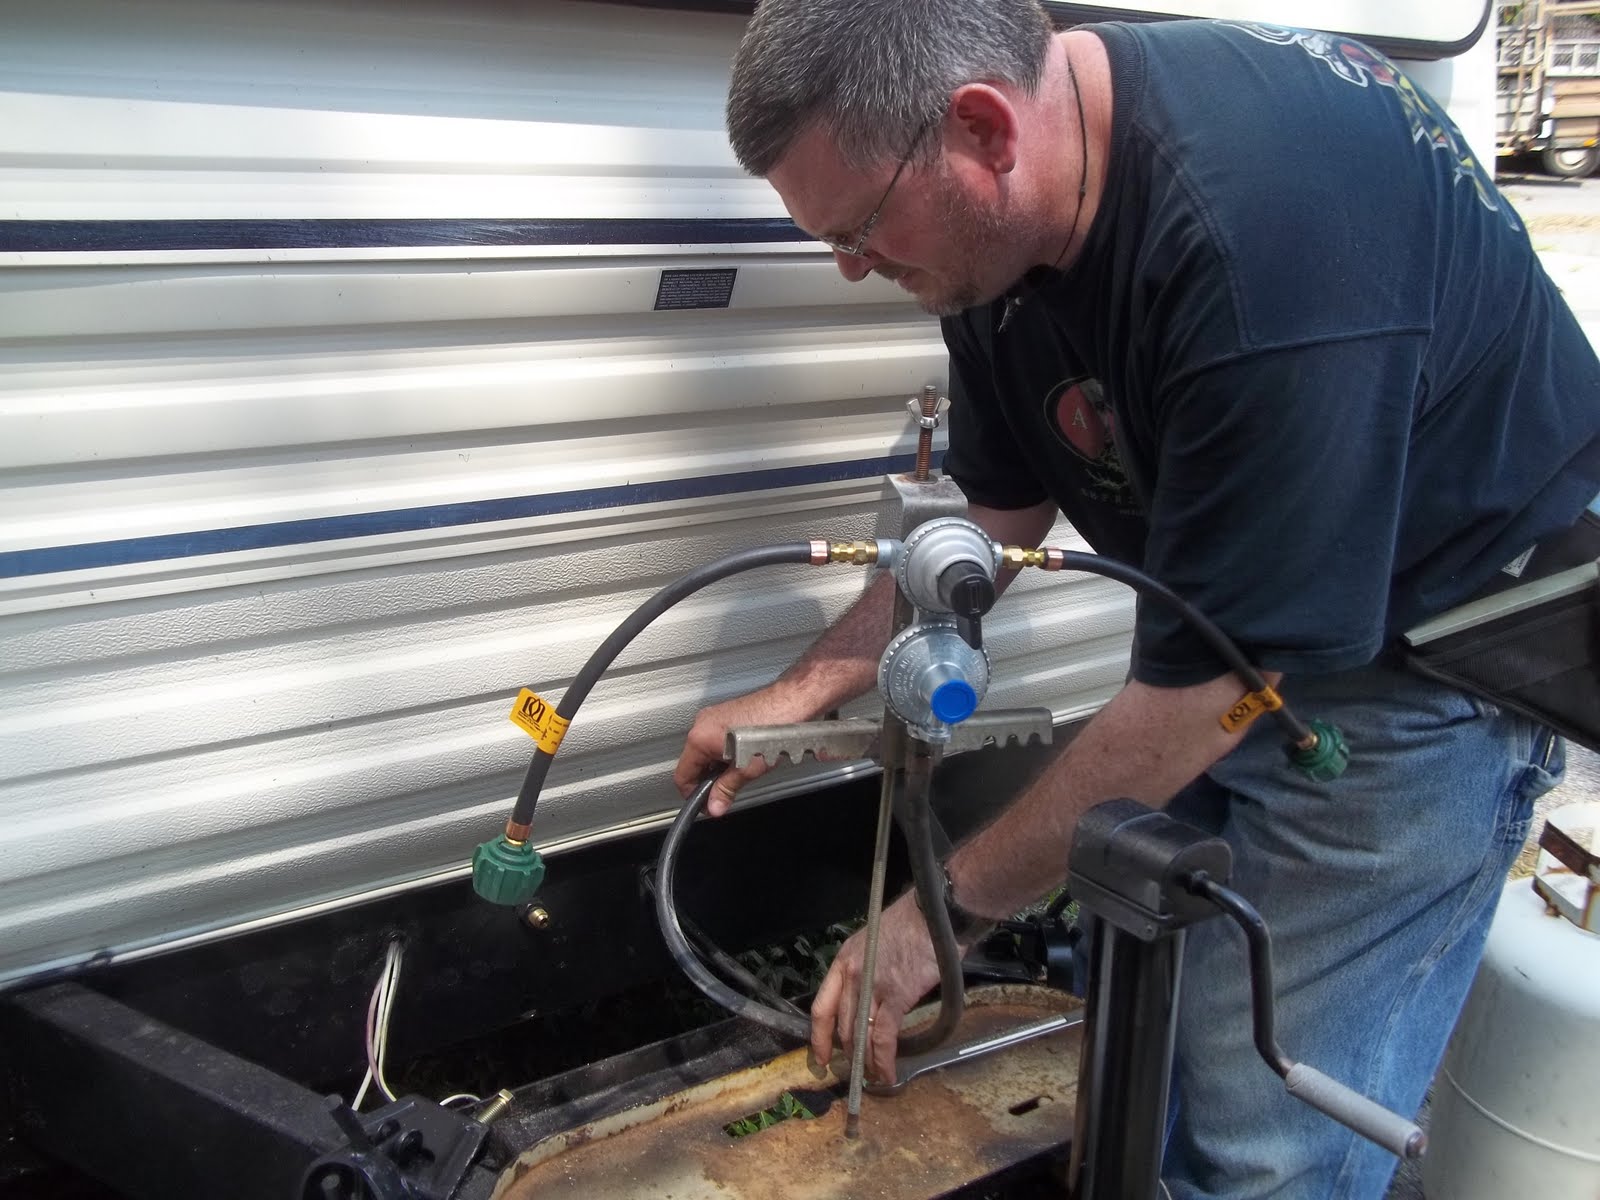

Next put the completed assembly back on the camper and reconnect the hose to the fitting on the frame. Finally use a spray bottle with some mild soap and water to wet all the connections and look for bubbles forming. If your see bubbles tighten the connections. When no bubbles form the installation is complete.
No comments:
Post a Comment